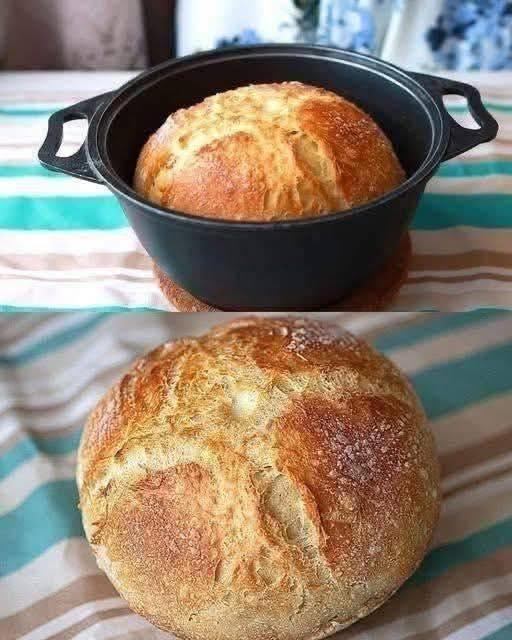
Recipe: Rustic No-Knead Pot Bread
-
Prep time: 10 minutes
-
Resting time: 12 to 18 hours
-
Bake time: 45 minutes
-
Servings: 1 loaf (approx. 8–10 slices)
Ingredients
-
Bread Flour: 3 cups (plus extra for dusting)
-
Salt: $1 \frac{1}{2}$ tsp
-
Active Dry Yeast: $1/4$ tsp (Yes, only a tiny bit!)
-
Water (Room Temp): $1 \frac{1}{2}$ cups
Instructions
-
The Mix: In a large bowl, whisk the flour, salt, and yeast. Pour in the water and stir with a wooden spoon until a shaggy, sticky dough forms.
-
The Long Nap: Cover the bowl tightly with plastic wrap. Let it sit at room temperature for at least 12 hours (up to 18 is better). The dough is ready when the surface is dotted with bubbles.
-
The Fold: Flour a work surface generously. Scrape the dough out—it will be loose. Fold it over itself once or twice. Cover loosely with plastic and let it rest for 15 minutes.
-
The Proof: Shape the dough into a rough ball. Place it seam-side down on a piece of parchment paper or a well-floured towel. Cover and let rise for 2 hours.
-
The Heat: 30 minutes before the dough is ready, place your heavy pot (with lid) in the oven and preheat to 230°C (450°F).
-
The Bake: Carefully drop the dough (using the parchment paper as a sling) into the hot pot. Cover with the lid.
-
Bake 30 minutes covered.
-
Bake 15 minutes uncovered (this creates the golden-brown crust).
-
-
The Wait: Let the bread cool on a wire rack for at least 1 hour before slicing. Slicing too early lets the steam escape and makes the bread gummy.
Nutritional Info (Per Slice)
| Nutrient | Amount |
| Calories | 165 kcal |
| Carbohydrates | 34g |
| Protein | 5g |
| Fat | 0.5g |
| Fiber | 1.5g |
Chef’s Tips for Success
-
Use Weight if Possible: While 3 cups works, flour is tricky to measure by volume. For the most consistent results, use 385g of flour and 345g of water.
-
The Pot Matters: A cast-iron Dutch oven is best because it retains heat and traps steam perfectly. If you don’t have one, any heavy oven-safe pot with a tight lid will work.
-
Don’t Fear the Sticky: This dough is much wetter than traditional dough. Resist the urge to add too much extra flour during the folding phase; the moisture is what creates the “holes” (crumb) in the bread.
Benefits of This Recipe
-
Digestibility: The long fermentation breaks down gluten and phytic acid more effectively than quick-rise breads, making it easier on the stomach.
-
Zero Equipment: You don’t need a stand mixer, a bread machine, or even strong forearms.
-
Cost-Effective: It costs pennies to make compared to the $6–$8 you’d pay at a specialty bakery.
Q&A
Q: Can I use Whole Wheat flour?
A: You can, but whole wheat is denser. I recommend starting with a 50/50 mix of white bread flour and whole wheat to ensure the bread still rises well.
Q: My crust is too hard to cut. What happened?
A: That’s actually the sign of a great loaf! However, if you prefer a softer crust, brush the loaf with a little butter immediately after taking it out of the oven.
Q: Can I add flavors?
A: Absolutely. Fold in roasted garlic, rosemary, or shredded cheddar during “The Fold” step (Step 3).