No-Knead Dutch Oven Bread
Description
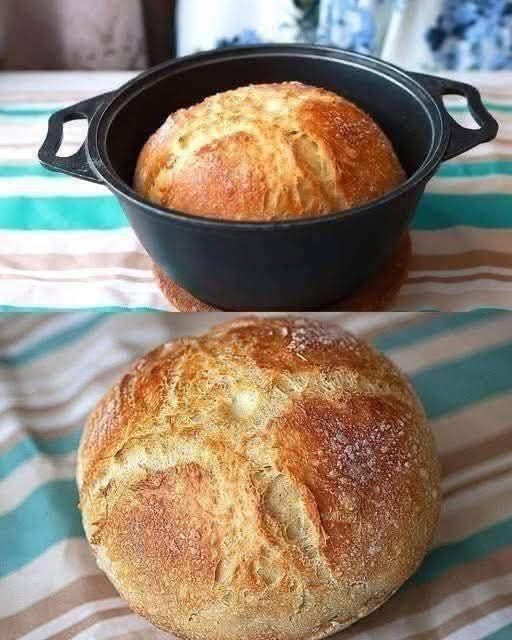
This rustic No-Knead Dutch Oven Bread is a game-changer for home bakers. It yields a loaf with a crisp, golden crust and a soft, airy interior with minimal effort. The beauty of this recipe is its simplicity: you mix, let it rise slowly, and bake in a preheated Dutch oven. Perfect for beginners and busy home cooks who want artisan-style bread at home without kneading or complicated techniques.
Ingredients (for 1 loaf)
-
3 cups (360 g) all-purpose flour
-
1/4 teaspoon instant yeast (or 1/8 tsp active dry yeast)
-
1 1/4 teaspoons salt
-
1 1/2 cups (360 ml) warm water (around 105–110°F / 40–43°C)
-
Optional: 1 tablespoon olive oil (for extra flavor & softness)
Instructions
Step 1: Mix the dough
-
In a large bowl, combine the flour, yeast, and salt.
-
Gradually add water and stir with a wooden spoon or spatula until all flour is hydrated and a sticky dough forms.
-
Cover the bowl loosely with plastic wrap or a damp cloth.
Tip: Dough should look shaggy and wet. Don’t worry about kneading—it’s part of the no-knead magic!
Step 2: First rise (bulk fermentation)
-
Let the dough rise at room temperature for 12–18 hours.
-
The dough is ready when it has doubled in size and bubbles form on the surface.
Note: Slow fermentation develops flavor and texture.
Step 3: Preheat the Dutch oven
-
Place a 4–6 quart Dutch oven (with lid) in the oven.
-
Preheat oven to 450°F (230°C) for at least 30 minutes.
Step 4: Shape the dough
-
Lightly flour a work surface.
-
Turn the dough onto it and gently fold it into a ball. Avoid deflating all the bubbles.
-
Place the dough on parchment paper for easy transfer.
Step 5: Bake
-
Carefully remove the hot Dutch oven from the oven.
-
Lift the dough (on parchment) and place it into the Dutch oven.
-
Cover with the lid and bake 30 minutes.
-
Remove the lid and bake an additional 10–15 minutes until crust is deep golden brown.
-
Transfer bread to a wire rack and cool at least 1 hour before slicing.
Tip: For an extra-crispy crust, sprinkle water in the oven or brush dough lightly with water before covering with the lid.
Serving Suggestions
-
Slice and serve with butter, jam, or cheese.
-
Use for sandwiches, toast, or homemade bruschetta.
-
Great accompaniment for soups and stews.
Notes & Tips
-
Patience is key: The long rise is what gives this bread its flavor and open crumb.
-
Dutch oven choice: Heavy cast iron works best; ceramic can work but may not retain heat as evenly.
-
Storage: Store at room temperature for up to 3 days in a paper bag. Freeze sliced for up to 3 months.
-
Flavor variations: Add herbs, garlic, or cheese to the dough before the first rise.
Servings
-
Makes 1 medium loaf
-
Slices into 10–12 pieces, depending on thickness
Nutritional Information (per slice, approx., based on 12 slices)
| Nutrient | Amount |
|---|---|
| Calories | 120 kcal |
| Carbohydrates | 24 g |
| Protein | 4 g |
| Fat | 1 g |
| Fiber | 1 g |
| Sodium | 150 mg |
Benefits
-
Homemade & preservative-free: Full control over ingredients.
-
Low-fat, high-carb energy: Great for sustained energy.
-
Digestive benefits: Slow fermentation improves digestibility and flavor.
-
Stress-free baking: No kneading or complicated steps.
Q&A
Q: Can I use whole wheat flour?
A: Yes! Replace up to 50% of all-purpose flour with whole wheat. Expect a denser loaf and slightly longer rising time.
Q: Can I make it faster?
A: You can use more yeast to speed up rising (1 tsp), but flavor may be less complex.
Q: Do I need a Dutch oven?
A: It’s highly recommended for the steam trap that creates the crispy crust. Alternative: use a baking sheet and a metal bowl to cover dough.
Q: Why does my bread have a gummy center?
A: Likely underbaked or sliced too soon. Ensure internal temperature reaches ~200°F (93°C) and cool fully.
Q: Can I add seeds or nuts?
A: Absolutely! Fold in sunflower seeds, sesame, or walnuts during shaping.