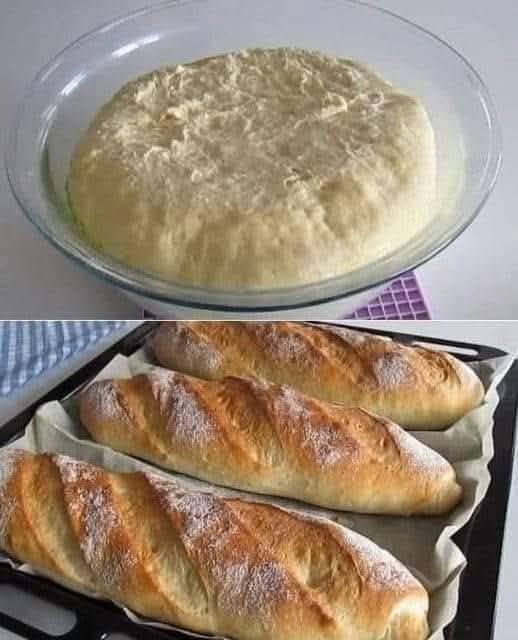
Homemade Artisan Bread
Ingredients:
-
4 tablespoons (60 ml) olive oil
-
Adds richness and flavor to the dough, giving the bread a slightly tender texture.
-
-
1 tablespoon (10 g) dry yeast
-
The leavening agent that helps the dough rise and gives the bread its airy texture.
-
-
1 teaspoon salt
-
Balances the flavor of the bread and helps strengthen the dough.
-
-
1 1/3 cups (320 ml) warm water
-
Activates the yeast and helps hydrate the dough.
-
-
4 3/4 cups (570 g) plain flour
-
The main ingredient that provides structure and texture to the bread.
-
-
Optional: Additional flour for dusting
-
To shape and prevent the dough from sticking.
-
Instructions:
-
Prepare the Dough:
-
In a large mixing bowl, combine the warm water, yeast, and olive oil. Stir and let it sit for about 5 minutes until the yeast starts to foam and activate.
-
-
Add the Dry Ingredients:
-
To the yeast mixture, add the flour and salt. Stir with a wooden spoon or your hands until the dough begins to come together.
-
-
Knead the Dough:
-
Turn the dough out onto a lightly floured surface. Knead the dough for about 8-10 minutes, or until it is smooth and elastic. If the dough is too sticky, add a little more flour, but be careful not to add too much, as you want to keep the dough soft and supple.
-
-
Let the Dough Rise:
-
Place the dough in a lightly oiled bowl, covering it with a clean kitchen towel or plastic wrap. Let it rise in a warm area for about 1-2 hours, or until it doubles in size.
-
-
Shape the Dough:
-
Once the dough has risen, punch it down to release the air. Divide it into 2 equal portions and shape each into a loaf or baguette form, depending on your preference.
-
-
Second Rise:
-
Place the shaped loaves on a baking sheet lined with parchment paper. Cover with a kitchen towel and let them rise for an additional 30 minutes.
-
-
Preheat the Oven:
-
Preheat your oven to 450°F (232°C). If desired, use a sharp knife or bread lame to make slashes on the top of the loaves for a decorative and professional look.
-
-
Bake the Bread:
-
Bake the bread for 25-30 minutes, or until the crust is golden brown and the bread sounds hollow when tapped on the bottom. You can also check the internal temperature—it should reach around 200°F (93°C) when fully cooked.
-
-
Cool and Serve:
-
Let the bread cool on a wire rack for about 20-30 minutes before slicing. This helps the bread set and ensures a tender crumb.
-
Benefits:
-
Homemade Freshness: There’s nothing like the smell of freshly baked bread! Homemade bread allows you to control the ingredients and ensure it’s fresh.
-
Customizable: You can add herbs, seeds, or cheese to the dough for a personalized touch.
-
No Preservatives: This bread is made without any preservatives or artificial ingredients that are often found in store-bought bread.
-
Better Control: By making it at home, you can adjust the texture and crust thickness to your liking.
Nutritional Info (Approximate per serving, 1 slice of bread):
-
Calories: 120-150 kcal (depends on size)
-
Carbohydrates: 25-30 g
-
Protein: 3-5 g
-
Fat: 5-7 g
-
Fiber: 1-2 g
-
Sodium: 200-250 mg
Tips:
-
Storage: Keep the bread in a sealed container or plastic bag at room temperature for 2-3 days. For longer storage, freeze the bread and thaw it when needed.
-
Flavor Add-ins: Feel free to add ingredients like rosemary, garlic, or olives to customize the flavor.
-
Crispy Crust: To get a crispier crust, place a small pan of water in the oven while baking to create steam, or lightly spritz the bread with water before baking.
-
Baguette Shape: If making baguettes, use a baking stone or a baguette pan for an even crust.
Frequently Asked Questions (Q/A):
Q1: Can I use whole wheat flour instead of plain flour?
A1: Yes, you can substitute whole wheat flour for part or all of the plain flour. Keep in mind that whole wheat flour will make the bread denser, so you may need to adjust the hydration or kneading time.
Q2: Can I use active dry yeast instead of instant yeast?
A2: Yes, you can use active dry yeast. Simply activate it by dissolving it in warm water for 5-10 minutes before adding it to the flour mixture.
Q3: How can I make this bread gluten-free?
A3: To make this bread gluten-free, substitute the plain flour with a gluten-free flour blend that includes xanthan gum for structure. You may also need to adjust the water content.
Q4: Can I freeze the dough?
A4: Yes, you can freeze the dough after the first rise. Shape the dough, then wrap it tightly in plastic wrap and freeze for up to 3 months. When ready to bake, let it thaw in the fridge overnight and then proceed with the second rise.